springboot学习笔记
1 SpringBoot基本概念
1.1 什么是SpringBoot?
SpringBoot的特点:
- 创建独立的Spring应用程序。
- 嵌入式Tomcat、Jetty、Undertow容器。
- 提供的starter简化构建配置。
- 尽可能自动配置spring应用和第三方库。
- 提供生产指标,例如监控指标、健壮检查和外部化配置。
- 没有代码生成,无需XML配置,都是基于自动配置技术。
总结:简化开发、简化配置、简化整合、简化部署、简化监控、简化运维。
Springboot帮助我们简单、快速地创建一个独立地、生产级别的Spring应用。
1.2 SpringBoot的自动配置
自动配置:
- 导入启动器,容器中就会自动配置好这个启动器的核心组件。
- 如Tomcat、SpringMVC、DataSource等。
- 不喜欢的组件只会扫描主程序所在的包及其下面的子包。
默认的包扫描规则:
- SpringBoot只会扫描主程序所在的包及其下面的子包。
配置默认值:
- 配置文件的所有配置项是和某个类对象值进行一一绑定的。
- 很多配置即使不写都有默认值,如:端口号、字符编码等,
- 默认能写的所有配置项:
按需加载自动配置:
- 导入的启动器会导入全量自动配置包,但并不是都生效。
2 配置文件
在SpringBoot项目中,配置文件一般使用.yml文件,而不是.proterties文件。
2.1 yml配置信息书写与获取
- 三方技术配置信息
- 自定义配置信息
yaml语法规则
- 大小写敏感。
- 使用缩进表示层级关系,同层级左侧对齐,只允许使用空格(不允许使用Tab键)。
- 属性值前添加空格(属性名与属性值之间使用冒号+空格作为分隔)。
#表示注释。
# 普通对象
# 第一种写法
pig:
  id: 2
  name: 佩奇
  age: 5

# 第二种写法
person: {name: zhangsan, age: 23}


# 普通数组
# 第一种写法
hobby1:
  - game
  - music
  - sleep

# 第二种写法
hobby2: [game, music, sleep]


# 对象数组
# 第一种写法
users1:
  - name: zhangsan
    age: 18
  - name: lisi
    age: 20

# 第二种写法
users2:
  -
    name: zhangsan
    age: 18
  -
    name: lisi
    age: 20

# 第三种写法
users3: [{name: zhangsan, age: 24}, {name: lisi, age: 56}]


# 字面量表示方式
boolean: TRUE
float: 3.15
int: 123
null: ~
string: HelloWorld
string2: "hello world"
data: 2018-02-04
datatime: 2018-02-04T15:02:32+8:00  # 时间和日期之间使用T连接,最后使用+代表时区
yaml中的变量引用
spring:
  application:
    name: springboot
  data:
    redis:
    # 读取环境变量中的值
      password: ${REDIS_PASSWORD}
      port: 7899
      host: localhost

baseDir: D:\
tempDir: ${baseDir}\temp

# 如果使用 "${baseDir}\temp"  那么\t就会变成一个转义字符,没有加双引号的情况下不会变成转义字符
读取yaml中的所有属性数据
@Autowired
private org.springframework.core.env.Environment env;
配置信息获取
-
@Value("${键名}")@Value("${user.name}") @Value("${hobby[1]}") @Value("${users[1].name") -
@ConfiguraionProperties(prefix="前缀")
使用@SpringBootApplication的类,springboot默认扫描该类(启动类)所在的包及其子包。
如果想要扫描其他的包,可以手动在启动类上使用@ComponentScan来指定扫描的包路径。
2.2 配置文件分类
springboot中的4级配置文件
1级:file:config/application.yml 最高
2级:file:application.yml
3级:classpath:config/application.yml
4级:classpath:application.yml 最低
作用:
- 1级与2级留作系统打包后设置通用属性,1级常用于运维经理进行线上整体项目部署方案调控。
- 3级与4级用于系统开发阶段设置通用书信,3级常用于项目经理进行整体项目属性调控。
2.3 配置文件的优先级
Spring Boot 框架在启动时会尝试从以下位置加载 application.properties 配置文件:
- file:./config/ :首先在Spring Boot 当前工作目录下的
config 文件夹中查找。 - 注意:如果没有找到
application.properties会继续找application.yml ,如果这两个都没有找到,才会进入以下位置查找,以此类推。 - file:./ :如果在当前工作目录下
config目录中找不到时,再从当前工作目录中查找。 - classpath:/config/ :如果从工作目录中找不到,会从类路径中找,先从类路径的
/config/ 目录下寻找配置文件。 - classpath:/ :如果在
/config/ 下没有找到,它会在类路径的根目录下查找。
Spring Boot 会按照这个顺序来加载配置文件,如果在多个位置有相同的属性定义,那么最先检查的位置中的属性值将优先使用。
如果你想要指定其他的配置文件位置或者改变默认的行为,可以通过 --spring.config.location= 后跟路径的方式来指定配置文件的具体位置。例如 :
java -jar sb3-01-first-web-1.0-SNAPSHOT.jar --spring.config.location=file:///E:\a\b\application.properties
假如有
applicatiton.properties、application.yaml和application.yml三个配置文件,那么优先级为applicatiton.properties >application.yml >application.yaml。
2.4 配置文件的合并
一个项目中所有的配置全部编写到application.properties文件中,会导致配置臃肿,不易维护,有时我们会将配置编写到不同的文件中,例如:application-mysql.properties专门配置mysql的信息,application-redis.properties专门配置redis的信息,最终将两个配置文件合并到一个配置文件中。
spring:
  config:
    import:
      - classpath:application-mysql.yml
      - classpath:application-redis.yml
2.5 配置文件中的属性绑定到bean
2.5.1 绑定简单bean
假设有如下配置
app:
  name: jack
  age: 30
  email: jack@123.com
Bean需要这样定义:
package com.powernode.sb307externalconfig.bean;

import org.springframework.boot.context.properties.ConfigurationProperties;
import org.springframework.stereotype.Component;

@Component
@ConfigurationProperties(prefix = "app")
public class AppBean {
    private String name;
    private Integer age;
    private String email;

    // 省略set, get和toString方法
}
说明:
-
被绑定的bean,需要使用
@ConfigurationProperties(prefix = "app")注解进行标注,prefix用来指定前缀,哪个是前缀,如下图所示: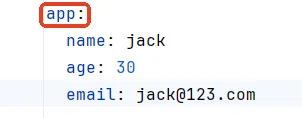
配置文件中的name、age、email要和bean对象的属性名name、age、email对应上。(属性名相同)
并且bean中的所有属性都提供了setter方法。因为底层是通过setter方法给bean属性赋值的。
-
这样的bean需要纳入IoC容器的管理。
@ConfigurationProperties(prefix = "app")注解负责给bean对象的属性赋值。 -
bean的属性需要是
非static的属性。
2.5.2 绑定嵌套bean
有如下配置:
app:
  name: jack
  age: 30
  email: jack@123.com
  address:
    city: BJ
    street: ChaoYang
    zipcode: 123456
需要编写这样的两个bean:
package com.powernode.sb307externalconfig.bean;

import org.springframework.boot.context.properties.ConfigurationProperties;
import org.springframework.context.annotation.Configuration;

@Configuration(proxyBeanMethods = false)
@ConfigurationProperties(prefix = "app")
public class AppBean {
    private String name;
    private Integer age;
    private String email;
    private Address address;
	// 省略set, get和toString方法
}
package com.powernode.sb307externalconfig.bean;

public class Address {
    private String city;
    private String street;
    private String zipcode;
	// 省略set, get和toString方法
}
2.5.3 @EnableConfigurationProperties与@ConfigurationPropertiesScan
将AppBean纳入IoC容器的管理,之前我们说了两种方式:第一种是使用@Component,第二种是使用@Configuration。SpringBoot其实还提供了另外两种方式:
- 第一种:@EnableConfigurationProperties,导入第三方写好的组件进行属性绑定。
- 第二种:@ConfigurationPropertiesScan
这两个注解都是标注在SpringBoot主入口程序上的
@EnableConfigurationProperties(AppBean.class)
@SpringBootApplication
public class Sb307ExternalConfigApplication {
    public static void main(String[] args) {
        SpringApplication.run(Sb307ExternalConfigApplication.class, args);
    }
}
或者
@ConfigurationPropertiesScan(basePackages = "com.powernode.sb307externalconfig.bean")
@SpringBootApplication
public class Sb307ExternalConfigApplication {
    public static void main(String[] args) {
        SpringApplication.run(Sb307ExternalConfigApplication.class, args);
    }
}
2.5.4 将配置赋值到Bean的Map/List/Array属性上
代码如下
package com.powernode.sb307externalconfig.bean;

import org.springframework.boot.context.properties.ConfigurationProperties;

import java.util.Arrays;
import java.util.List;
import java.util.Map;

@ConfigurationProperties
public class CollectionConfig {
    private String[] names;
    private List<Product> products;
    private Map<String, Vip> vips;
}

class Product {
    private String name;
    private Double price;
}

class Vip {
    private String name;
    private Integer age;
}
配置信息如下
#数组
names:
  - jackson
  - lucy
  - lili

#List集合
products:
  - name: 西瓜
    price: 3.0
  - name: 苹果
    price: 2.0

#Map集合
vips:
  vip1:
    name: 张三
    age: 20
  vip2:
    name: 李四
    age: 22
提醒:记得入口程序使用@ConfigurationPropertiesScan(basePackages \= "com.powernode.sb307externalconfig.bean")进行标注。
2.5.5 将配置绑定到第三方对象
address:
  city: TJ
  street: XiangYangLu
  zipcode: 11111111
@Configuration
public class ApplicationConfig {
    @Bean
    @ConfigurationProperties(prefix = "address")
    public Address getAddress(){
        return new Address();
    }
}
2.5.6 指定数据来源
之前所讲的内容是将Spring Boot框架默认的配置文件application.properties或application.yml作为数据的来源绑定到Bean上。如果配置信息没有在默认的配置文件中呢?可以使用@PropertySource注解指定配置文件的位置,这个配置文件可以是.properties,也可以是.xml。这里重点掌握.properties即可。
在resources目录下新建a目录,在a目录下新建b目录,b目录中新建group-info.properties文件,进行如下的配置:
group.name=IT
group.leader=LaoDu
group.count=20
package com.powernode.sb307externalconfig.bean;

import org.springframework.boot.context.properties.ConfigurationProperties;
import org.springframework.context.annotation.Configuration;
import org.springframework.context.annotation.PropertySource;

@Configuration
@ConfigurationProperties(prefix = "group")
@PropertySource("classpath:a/b/group-info.properties")
public class Group {
    private String name;
    private String leader;
    private Integer count;

    // 省略set, get和toString方法
}
以下三个注解分别起到什么作用:
- @Configuration:指定该类为配置类,纳入Spring容器的管理
- @ConfigurationProperties(prefix = "group"):将配置文件中的值赋值给Bean对象的属性
- @PropertySource("classpath:a/b/group-info.properties"):指定额外的配置文件
2.6 Envirnoment
在Spring Boot中,Environment接口提供了访问应用程序环境信息的方法,比如活动配置文件、系统环境变量、命令行参数等。Environment接口由Spring框架提供,Spring Boot应用程序通常会使用Spring提供的实现类AbstractEnvironment及其子类来实现具体的环境功能。
Environment对象封装的主要数据包括:
- Active Profiles: 当前激活的配置文件列表。Spring Boot允许应用程序定义不同的环境配置文件(如开发环境、测试环境和生产环境),通过激活不同的配置文件来改变应用程序的行为。
- System Properties: 系统属性,通常是操作系统级别的属性,比如操作系统名称、Java版本等。
- System Environment Variables: 系统环境变量,这些变量通常是由操作系统提供的,可以在启动应用程序时设置特定的值。
- Command Line Arguments: 应用程序启动时传递给主方法的命令行参数。
- Property Sources:
Environment还包含了一个PropertySource列表,这个列表包含了从不同来源加载的所有属性。PropertySource可以来自多种地方,比如配置文件、系统属性、环境变量等。
在Spring Boot中,可以通过注入Environment来获取上述信息。例如:
package com.powernode.springboot.bean;

import org.springframework.beans.factory.annotation.Autowired;
import org.springframework.core.env.Environment;
import org.springframework.stereotype.Component;

@Component
public class SomeBean {

    @Autowired
    private Environment environment;

    public void doSome(){
        // 直接使用这个环境对象,来获取环境信息,配置信息等。
        String[] activeProfiles = environment.getActiveProfiles();
        for (String activeProfile : activeProfiles) {
            System.out.println(activeProfile);
        }

        // 获取配置信息
        String street = environment.getProperty("app.xyz.addr.street");
        System.out.println(street);
    }
}
2.7 多环境配置
多环境配置主要通过配置文件来实现,可以创建多个配置文件,如application-dev.yml, application-test.yml, application-prod.yml, 最后用一个application.yml进行汇总。
激活指定环境的方式:
- 配置文件:
spring.profiles.active=dev - 命令行参数:
java -jar myapp.jar --spring.profiles.active=prod - 环境变量:
export SPRING_PROFILES_ACTIVE=prod - 在测试类中指定:在类上添加
@ActiveProfiles("test") - 使用@Profile注解来指定在特定环境下才加载指定组件。
也可以将所有环境的配置写到同一个配置文件夹中
# application.yml
spring:
  profiles:
    active: dev

---
# 开发环境配置
spring:
  profiles: dev
server:
  port: 8080

---
# 生产环境配置
spring:
  profiles: prod
server:
  port: 80
配置的优先级(由高到低):
- 命令行参数
- Java 系统属性 (System.getProperties())
- 操作系统环境变量
- 打包在 jar 外的配置文件
- 打包在 jar 内的配置文件
3 Bean注册
在学习Spring的时候了解到可以在类上添加@Component、@Controller、@Service、@Repositor注解来完成Bean的注册。
如果要注册的bean对象来自于第三方(不是自定义的),那么是无法使用@Component注解及其衍生注解声明bean的。可以使用以下两个注解来解决该问题:
@Bean@Import
3.1 使用@Bean注解
package com.itheima.springbootmybatis;

import com.itheima.springbootmybatis.pojo.User;
import org.springframework.boot.SpringApplication;
import org.springframework.boot.autoconfigure.SpringBootApplication;
import org.springframework.context.annotation.Bean;

@SpringBootApplication
public class SpringbootMybatisApplication {

    public static void main(String[] args) {
        SpringApplication.run(SpringbootMybatisApplication.class, args);
    }

    // 在启动类中定义一个返回类对象的方法和使用@Bean注解来完成注入第三方的类对象
    // 将方法的返回值交给IoC容器管理,成为IoC容器的bean对象
    // 启动类,不推荐。
    @Bean
    public User user() {
        return new User();
    }
}
如果注册第三方bean,建议在配置类中集中注册。
package com.itheima.springbootmybatis.config;

import com.itheima.springbootmybatis.pojo.User;
import org.springframework.context.annotation.Bean;
import org.springframework.context.annotation.Configuration;

@Configuration
public class UserConfig {
    @Bean
    public User user() {
        return new User();
    }
}
3.2 使用@Import注解
-
一般导入以下类型的类:
- 配置类
- ImportSelector接口实现类
-
使用方法:在启动类上使用
@Import注解来完成注入
第二种方式
package com.itheima.springbootmybatis;

import com.itheima.springbootmybatis.config.UserConfig;
import org.springframework.boot.SpringApplication;
import org.springframework.boot.autoconfigure.SpringBootApplication;
import org.springframework.context.annotation.Import;

@SpringBootApplication
@Import(UserConfig.class)
public class SpringbootMybatisApplication {

    public static void main(String[] args) {
        SpringApplication.run(SpringbootMybatisApplication.class, args);

    }
}
由于UserConfig是一个配置类,那么该类里面添加@Bean注解的方法的返回值也会自动注入到IoC容器中。
UserConfig可以不在启动所有包及其子包下。
**第二种方法方式
package com.itheima.springbootmybatis.config;

import org.springframework.context.annotation.ImportSelector;
import org.springframework.core.type.AnnotationMetadata;

public class CommonImportSelector implements ImportSelector {
    @Override
    public String[] selectImports(AnnotationMetadata importingClassMetadata) {
        return new String[]{"com.itheima.springbootmybatis.config.UserConfig"};
    }
}
package com.itheima.springbootmybatis;

import com.itheima.springbootmybatis.config.CommonImportSelector;
import org.springframework.boot.SpringApplication;
import org.springframework.boot.autoconfigure.SpringBootApplication;
import org.springframework.context.annotation.Import;

@SpringBootApplication
@Import(CommonImportSelector.class)
public class SpringbootMybatisApplication {

    public static void main(String[] args) {
        SpringApplication.run(SpringbootMybatisApplication.class, args);

    }
}
第二种方式将中CommonImportSelector类中selectImports方法中将类的路径写死了,如果一般是将类的全路径名写在配置文件(例如:common.imports)当中,如果从配置文件中读取类的全路径名。
该配置文件的内容如下:
com.itheima.springbootmybatis.config.UserConfig
package com.itheima.springbootmybatis.config;

import org.springframework.context.annotation.ImportSelector;
import org.springframework.core.type.AnnotationMetadata;

import java.io.BufferedReader;
import java.io.IOException;
import java.io.InputStream;
import java.io.InputStreamReader;
import java.util.ArrayList;
import java.util.List;

public class CommonImportSelector implements ImportSelector {
    @Override
    public String[] selectImports(AnnotationMetadata importingClassMetadata) {
        List<String> imports = new ArrayList<>();
        InputStream is = CommonImportSelector.class.getClassLoader().getResourceAsStream("common.imports");
        BufferedReader br = new BufferedReader(new InputStreamReader(is));
        String line = null;
        try {
            while ((line = br.readLine()) != null) {
                imports.add(line);
            }
        } catch (IOException e) {
            throw new RuntimeException(e);
        } finally {
            try {
                br.close();
                is.close();
            } catch (IOException e) {
                throw new RuntimeException(e);
            }
        }
        return imports.toArray(new String[imports.size()]);
    }
}
3.3 注册条件
自动配置原理
遵循约定大于配置的原则,在boot程序启动后,起步依赖中的一些bean对象会自动注入到IoC容器中。
自定义starter
在实际开发中,经常会定义一些公共组件,提供给各个项目团队使用。而在SprinBoot的项目中,一般会将这些公共组件封装为SpringBoot的starter。
4 Spring Validation
Spring提供的一个参数校验框架,使用预定义的注解完成参数校验。
Validation 分组校验
把校验项进行归类分组,在完成不同的功能的时候,校验指定组中的校验项。 使用步骤:
- 定义分组。
- 定义校验项时指定归属的分组。
- 校验时指定要校验的分组。
使用步骤:
- 引入Spring Validation起步依赖。
- 在参数前面添加
@Pattern注解。 - 在Controller类上添加
@Validated注解。
Validation 自定义校验
已有的注解不能满足所有的校验需求,特殊的情况需要自定义校验(自定义校验注解)
自定义校验的步骤:
- 自定义注解State。
- 自定义校验数据的类StateValidation,实现ConstraintValidator接口。
- 在需要校验的地方使用自定义注解。
5 登录认证
令牌就是一段字符串。
- 承载业务数据,减少后续请求查询数据库的次数。
- 防篡改,保证信息的合法性和有效性。
JWT
-
JSON Web Token jwt官网
-
定义了一种简洁的、自包含的格式,用于通信双方以json数据格式安全的传输信息。
-
组成:
- 第一部分:Header(头),记录令牌类型,签名算法等。例如:
{"alg": "HS256", "type": "JWT"}。 - 第二部分:Payload(有效载荷),携带一些自定义信息、默认信息等。例如:
{"id":"1", "username":"Tom"}。(注意:载荷不能存放私密信息) - 第三部分:Signature(签名),防止Token被窜改、确保安全性。将header、payload、并加入指定密钥,通过指定签名算法计算而来。
- 第一部分:Header(头),记录令牌类型,签名算法等。例如:
package com.zxs.bigevent;

import com.auth0.jwt.JWT;
import com.auth0.jwt.JWTVerifier;
import com.auth0.jwt.algorithms.Algorithm;
import com.auth0.jwt.interfaces.Claim;
import com.auth0.jwt.interfaces.DecodedJWT;
import org.junit.jupiter.api.Test;

import java.time.Instant;
import java.util.Date;
import java.util.HashMap;
import java.util.Map;

public class JwtTest {
    @Test
    void testGen() {
        Map<String, Object> claims = new HashMap<>();
        claims.put("id", 1);
        claims.put("username", "张三");
        // 生成jwt代码
        String token = JWT.create()
                .withClaim("user", claims)
                .withExpiresAt(new Date(System.currentTimeMillis()))
                .sign(Algorithm.HMAC256("itheima"));
        System.out.println("token = " + token);
    }

    @Test
    void testParse() {
        // 定义字符串模拟用户传过来的token
        String token = "eyJhbGciOiJIUzI1NiIsInR5cCI6IkpXVCJ9.eyJ1c2VyIjp7ImlkIjoxLCJ1c2VybmFtZSI6IuW8oOS4iSJ9LCJleHAiOjE3MjgyNjI0NDN9.KAU9dEIXGjJxlUvz8SNEaZ5duF0gHjR5SfZyB_r1bG0";

        JWTVerifier jwtVerifier = JWT.require(Algorithm.HMAC256("itheima")).build();
        // 验证token,生成一个解析后的JWT对象
        DecodedJWT decodedJWT = jwtVerifier.verify(token);
        Map<String, Claim> claims = decodedJWT.getClaims();
        System.out.println(claims.get("user"));

        // 如果篡改了头部和载荷部分的数据,那么验证失败
        // 如果密钥篡改了,验证失败
        // token过期,验证失败

    }
}
6 多环境开发-Pofiles
SpringBoot提供的ProfilesT可以用来隔离应用程序配置的各个部分,并在特定环境下指定部分配置生效。
-
如何分隔不同环境的配置?
---
-
如果指定哪些配置属于哪个环境?
-
spring:
  config:
    activate:
      on-profile: 环境名称
-
-
如何指定哪个环境的配置生效?
-
spring:
  profiles:
    active: 环境名称
-
-
根据功能对配置文件中的信息进行拆分,并制作成独立的配置文件,命名规范如下:
application-devDB.ymlapplication-devRedis.ymlapplication-devMVC.yml
-
使用include属性在激活指定环境的情况下,同时对多个环境进行加载使其生效,多个环境间使用逗号分隔。
7 日志
logging:
  file:
    name: server.log   # 设置日志文件
  logback:
    rollingpolicy:   # 日志文件详细配置
      max-file-size: 10MB
      file-name-pattern: server.%d{yyyy-MM-dd}.%i.log
通常我们配置 application.properties 就够了。当然也可以自定义。比如:
| 日志系统 | 自定义 |
|---|---|
| Logback | logback-spring.xml, logback-spring.groovy, logback.xml, orlogback.groovy |
| Log4j2 | log4j2-spring.xml or log4j2.xml |
| JDK (Java Util Logging) | logging.properties |
如果可能,我们建议您在日志配置中使用-spring 变量(例如,logback-spring.xml 而不是 logback.xml)。如果您使用标准配置文件,spring 无法完全控制日志初始化。
最佳实战:自己要写配置,配置文件名加上 xx-spring.xml ,安装不同的日志级别输出到不同的日志文件中。
切换日志组合:
<dependency>
    <groupId>org.springframework.boot</groupId>
    <artifactId>spring-boot-starter-web</artifactId>
</dependency>
<dependency>
    <groupId>org.springframework.boot</groupId>
    <artifactId>spring-boot-starter</artifactId>
    <exclusions>
        <exclusion>
            <groupId>org.springframework.boot</groupId>
            <artifactId>spring-boot-starter-logging</artifactId>
        </exclusion>
    </exclusions>
</dependency>
<dependency>
    <groupId>org.springframework.boot</groupId>
    <artifactId>spring-boot-starter-log4j2</artifactId>
</dependency>
log4j2的性能比logback好。
最佳实战:
- 导入任何第三方框架,先排除它的日志包,因为Boot底层控制好了日志。
- 修改
application.properties 配置文件,就可以调整日志的所有行为。如果不够,可以编写日志框架自己的配置文件放在类路径下就行,比如logback-spring.xml,log4j2-spring.xml - 如需对接专业日志系统,也只需要把 logback 记录的日志灌倒kafka之类的中间件,这和SpringBoot没关系,都是日志框架自己的配置,修改配置文件即可。
- 业务中使用slf4j-api记录日志。不要再 sout 了。
8 热部署
8.1 使用热部署的方式
-
导入依赖
<!-- https://mvnrepository.com/artifact/org.springframework.boot/spring-boot-devtools -->
<dependency>
    <groupId>org.springframework.boot</groupId>
    <artifactId>spring-boot-devtools</artifactId>
    <version>3.3.5</version>
</dependency>
使用Ctrl + F9启动热部署。
关于热部署
- 重启(Restart):自定义开发代码,包含类、页面、配置文件等,加载位置restart类加载器。
- 重载(ReLoad):jar包,加载位置base类加载器。
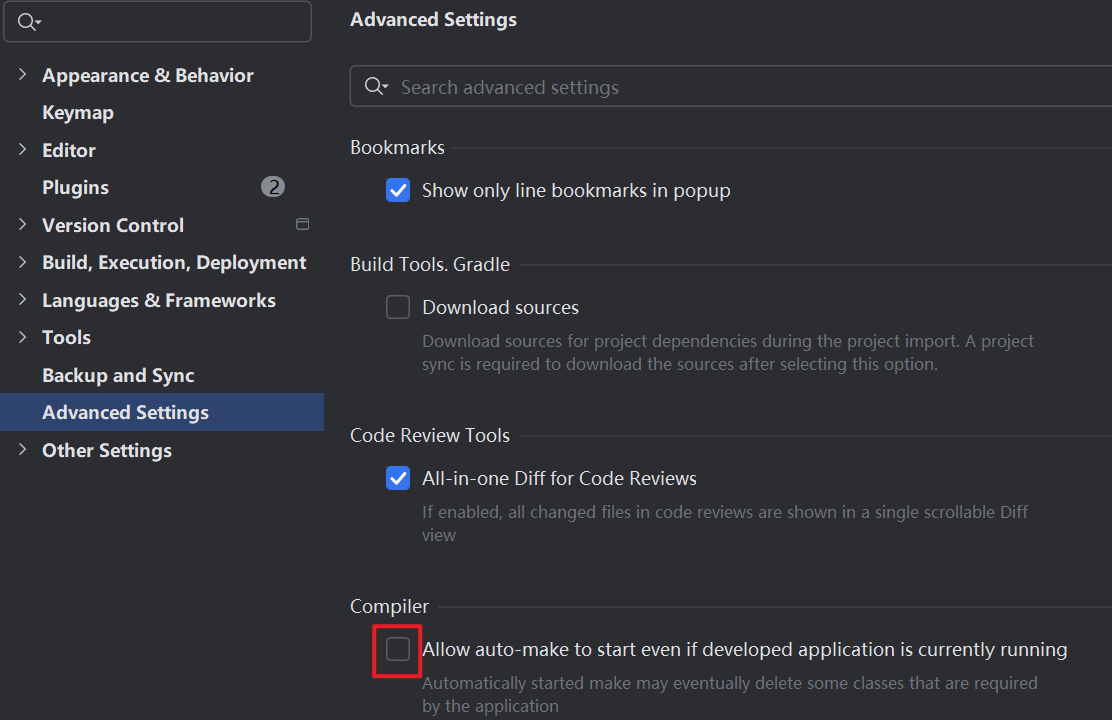
如何开启自动build?
idea2022以后,可以勾选如下的选项:
8.2 热部署范围配置
-
默认不触发重启的目录列表
- /META-INF/maven
- /META-INF/resources
- /resources
- /static
- /public
- /tamplates
-
自定义不参与重启排除项
devtools:
  restart:
    exclude: public/**,static/**
9 第三方Bean属性绑定
@SpringBootApplication
@EnableConfigurationProperties(ServerConfig.class)
public class Application {

}
@ConfigurationProperties(prefix = "servers")
public class ServerConfig {
	private String ipAddress;
	private int port;
	private long timeout;
}
配置文件的内容如下:
servers:
  ipAddress: 192.0.0.1
  port: 456
  timeout: -1
注意:
@EnableConfigurationProperties与@Component不能同时使用。
10 宽松绑定
@ConfigurationProperties绑定属性支持属性名宽松绑定。
# 驼峰模式
servers:
  ipAddress:
  port:
  timeout:

# 下划线模式
servers:
  ip_address:
  port:
  timeout:

# 中划线模式
servers:
  ip-address:
  port:
  timeout:

# 常量模式
servers:
  IP_ADDRESS:
  port:
  timeout:
绑定前缀名命名规范:仅能使用纯小写字母、数字、下划线作为合法的字符。
SpringBoot支持JDK提供的时间与空间计量单位
@Component
@Date
@ConfiguurationProperties(prefix = "servsers")
public class ServerConfig {
	private String ipAddress;
	private int port;
	private long timeout;

    @DurationUnit(ChronoUnit.MINUTES)
    private Duration connectionTimeout;

    @DataSizeUnit(DataUnit.MEGABYTES)
    private DataSize dataSize;

}
11 测试
11.1 加载测试专用属性
package com.itheima;

import org.junit.jupiter.api.Test;
import org.springframework.beans.factory.annotation.Value;
import org.springframework.boot.test.context.SpringBootTest;

@SpringBootTest(properties = "test.prop=testValue", args = "--test.arg=testArg")
class PropertiesAndArgTest {
    @Value("${test.prop}")
    private String prop;

    @Value("${test.arg}")
    private String arg;

    @Test
    void testProperties() {
        System.out.println(prop);
    }

    @Test
    void testArgs() {
        System.out.println(arg);
    }
}
11.2 加载测试专用配置
package com.itheima.config;

import org.springframework.context.annotation.Bean;
import org.springframework.context.annotation.Configuration;

@Configuration
public class MsgConfig {
    @Bean
    public String msg() {
        return "bean msg";
    }
}
package com.itheima;

import org.junit.jupiter.api.Test;
import org.springframework.beans.factory.annotation.Autowired;
import org.springframework.boot.test.context.SpringBootTest;

@SpringBootTest(webEnvironment = SpringBootTest.WebEnvironment.NONE)
public class ConfigurationTest {

    @Autowired
    private String msg;

    @Test
    void testConfiguration() {
        System.out.println(msg);
    }
}
11.3 Web环境模拟测试
package com.itheima;

import org.junit.jupiter.api.Test;
import org.springframework.boot.test.context.SpringBootTest;

@SpringBootTest(webEnvironment = SpringBootTest.WebEnvironment.RANDOM_PORT)
public class WebTest {

    @Test
    void test() {

    }
}
11.4 数据层测试回滚
package com.itheima;

import org.junit.jupiter.api.Test;
import org.springframework.beans.factory.annotation.Autowired;
import org.springframework.boot.test.autoconfigure.web.servlet.AutoConfigureMockMvc;
import org.springframework.boot.test.context.SpringBootTest;
import org.springframework.test.web.servlet.MockMvc;
import org.springframework.test.web.servlet.ResultActions;
import org.springframework.test.web.servlet.ResultMatcher;
import org.springframework.test.web.servlet.request.MockHttpServletRequestBuilder;
import org.springframework.test.web.servlet.request.MockMvcRequestBuilders;
import org.springframework.test.web.servlet.result.ContentResultMatchers;
import org.springframework.test.web.servlet.result.HeaderResultMatchers;
import org.springframework.test.web.servlet.result.MockMvcResultMatchers;
import org.springframework.test.web.servlet.result.StatusResultMatchers;

@SpringBootTest(webEnvironment = SpringBootTest.WebEnvironment.RANDOM_PORT)
@AutoConfigureMockMvc  // 开启虚拟MVC调用
public class WebTest {
    @Test
    void testWeb(@Autowired MockMvc mvc) throws Exception {
        MockHttpServletRequestBuilder builder = MockMvcRequestBuilders.get("/books");
        mvc.perform(builder);
    }

    @Test
    void testStatus(@Autowired MockMvc mvc) throws Exception {
        MockHttpServletRequestBuilder builder = MockMvcRequestBuilders.get("/books");
        ResultActions resultActions = mvc.perform(builder);

        // 设置预期值,与真实值进行比较,成功测试通过,失败测试失败
        StatusResultMatchers status = MockMvcResultMatchers.status();
        // 预计本次调用是成功的
        ResultMatcher ok = status.isOk();

        // 将本次真实执行结课与预期结果进行比对
        resultActions.andExpect(ok);
    }

    @Test
    void testBody(@Autowired MockMvc mvc) throws Exception {
        MockHttpServletRequestBuilder builder = MockMvcRequestBuilders.get("/books");
        ResultActions resultActions = mvc.perform(builder);

        // 设置预期值,与真实值进行比较,成功测试通过,失败测试失败
        ContentResultMatchers content = MockMvcResultMatchers.content();
        // 预计本次调用的响应体为springboot
        ResultMatcher result = content.string("springboot");

        // 将本次真实执行结课与预期结果进行比对
        resultActions.andExpect(result);
    }

    @Test
    void testJson(@Autowired MockMvc mvc) throws Exception {
        MockHttpServletRequestBuilder builder = MockMvcRequestBuilders.get("/books");
        ResultActions resultActions = mvc.perform(builder);

        // 设置预期值,与真实值进行比较,成功测试通过,失败测试失败
        ContentResultMatchers content = MockMvcResultMatchers.content();
        // 预计本次调用的响应体为
        ResultMatcher result = content.json("{\"id\":1,\"title\":\"三体\",\"author\":\"张三\",\"type\":\"科幻\"}");

        // 将本次真实执行结课与预期结果进行比对
        resultActions.andExpect(result);
    }

    @Test
    void testContentType(@Autowired MockMvc mvc) throws Exception {
        MockHttpServletRequestBuilder builder = MockMvcRequestBuilders.get("/books");
        ResultActions resultActions = mvc.perform(builder);

        // 设置预期值,与真实值进行比较,成功测试通过,失败测试失败
        HeaderResultMatchers header = MockMvcResultMatchers.header();
        // 预计本次调用的
        ResultMatcher result = header.string("Content-Type", "application/json");

        // 将本次真实执行结课与预期结果进行比对
        resultActions.andExpect(result);
    }
}
想要数据层测试回滚,可以在测试类上加上@Transactional注解,默认会自动回滚。注意,该测试类上需要加@SpringBootTest注解。如果想要回滚,可以使用在测试类上使用@Rollback(false)注解。
11.5 测试用例数据设定
testcase:
  book:
    id: ${random.int(10)}  # 1-10
    id2: ${random.int(5,10)}
    name: ${random.value}
    uuid: ${random.uuid}
    publishTime: ${random.long}
12 缓存
- 缓存是一种介于数据永久存储介质与数据应用之间的数据临时存储介质。
- 使用缓存可以有效地减少低速数据读取过程地次数(例如磁盘IO),提高系统性能。
- 缓存不仅可以用于提高永久性存储介质的数据读取效率,还可以提供临时的数据存储空间。
12.1 Spring提供的缓存
-
导入依赖并启用缓存。
<!-- https://mvnrepository.com/artifact/org.springframework.boot/spring-boot-starter-cache -->
<dependency>
    <groupId>org.springframework.boot</groupId>
    <artifactId>spring-boot-starter-cache</artifactId>
</dependency>
然后在启动类上加
@EnableCaching注解。 -
设置进入缓存的数据。
-
设置读取缓存的数据。
    @Cacheable(value = "cacheSpace", key = "#id")
    @GetMapping("/{id}")
    public Result get(@PathVariable Integer id) {
        log.info("根据id查询员工信息,id为:{}", id);

        Emp emp = empService.getInfo(id);
        return Result.success(emp);
    }
SpringBoot提供的缓存技术处理提供默认的缓存方案,还可以对其他缓存技术进行整合,统一接口,方便缓存技术的开发与管理。
12.2 EhCache缓存
-
导入依赖
<!-- https://mvnrepository.com/artifact/org.ehcache/ehcache --> <dependency> <groupId>org.ehcache</groupId> <artifactId>ehcache</artifactId> </dependency> -
在配置文件中将缓存设置为Ehcache.
spring:
  cache:
	type: ehcache
	ehcache:
	  config: ehcache.xml
如果是单体应用,或对缓存访问要求很高,可考虑采用EhCache;如果是大型系统,存在缓存共享、分布式部署、缓存内容很大时,则建议采用Redis。
12 数据层解决方案
13 内嵌数据库
SpringBoot提供了3中内嵌数据库供开发者选择,提高开发效率
- H2
- HSQL
- Derby
14 启动类
在类上写@SpringBootApplication注解(复合注解),表明该注解为启动类。
该注解被下面三个注解标注:
@SpringBootConfiguration@EnableAutoConfiguration@ComponentScan
15 AOP开发
-
引入依赖
<!--aop启动器--> <dependency> <groupId>org.springframework.boot</groupId> <artifactId>spring-boot-starter-aop</artifactId> </dependency> -
编写切面类
package com.powernode.aop;

import org.aspectj.lang.JoinPoint;
import org.aspectj.lang.annotation.Aspect;
import org.aspectj.lang.annotation.Before;
import org.springframework.stereotype.Component;

import java.time.LocalDateTime;
import java.time.format.DateTimeFormatter;

@Component // 纳入IoC容器
@Aspect // 指定该类为切面类
public class LogAspect {
    // 日期格式化器
    private DateTimeFormatter formatter = DateTimeFormatter.ofPattern("yyyy-MM-dd HH:mm:ss SSS");

    // 前置通知
    // 切入点表达式:service包下任意类的任意方法
    @Before("execution(* com.powernode.aop.service..*.*(..))")
    public void sysLog(JoinPoint joinPoint) throws Throwable {
        StringBuilder log = new StringBuilder();
        LocalDateTime now = LocalDateTime.now();
        String strNow = formatter.format(now);
        // 追加日期
        log.append(strNow);
        // 追加冒号
        log.append(":");
        // 追加方法签名
        log.append(joinPoint.getSignature().getName());
        // 追加方法参数
        log.append("(");
        Object[] args = joinPoint.getArgs();
        for (int i = 0; i < args.length; i++) {
            log.append(args[i]);
            if(i < args.length - 1) {
                log.append(",");
            }
        }
        log.append(")");
        System.out.println(log);
    }
}
16 静态资源处理
在springboot中对静态资源处理进行了默认的配置。